Blogging isn't dead but it had become less frivolous...

Using This Guide you can learn how to make your own blog easily,,
You can make your own Blog in two platforms in Blogger which is provided by Google or in Wordpress. But please be informed that Blogger is made for beginners and who can't afford too much money.....and Wordpress is meant for those who have their past experience in blogging and who can afford money.......So Before we Go on Let's know about these blogging services...:
Blogger :
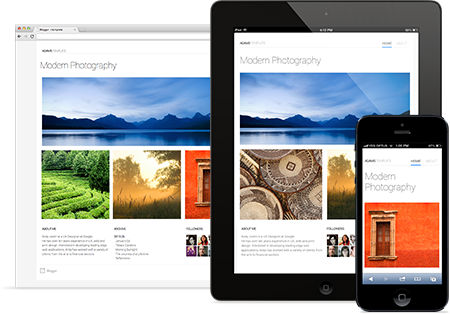
Design your blog
Create a beautiful blog that fits your style. Choose from easy-to-use templates with flexible layouts and hundreds of background images, or edit your blog’s CSS and HTML to create something entirely unique. If you’re using your blog for a brand or business, you can create a custom domain that’s easy for people to find and follow.WordPress:
Here are some of the features that we think that you'll love.
- Simplicity Simplicity makes it possible for you to get online and get publishing, quickly. Nothing should get in the way of you getting your website up and your content out there. WordPress is built to make that happen.
- Flexibility With WordPress, you can create any type of website you want: a personal blog or website, a photoblog, a business website, a professional portfolio, a government website, a magazine or news website, an online community, even a network of websites. You can make your website beautiful with themes, and extend it with plugins. You can even build your very own application.
- Publish with Ease If you've ever created a document, you're already a whizz at creating content with WordPress. You can create Posts and Pages, format them easily, insert media, and with the click of a button your content is live and on the web.
- Publishing Tools WordPress makes it easy for you to manage your content. Create drafts, schedule publication, and look at your post revisions. Make your content public or private, and secure posts and pages with a password.
- User Management Not everyone requires the same access to your website. Administrators manage the site, editors work with content, authors and contributors write that content, and subscribers have a profile that they can manage. This lets you have a variety of contributors to your website, and let others simply be part of your community.
- Media Management They say a picture says a thousand words, which is why it's important for you to be able to quickly and easily upload images and media to WordPress. Drag and drop your media into the uploader to add it to your website. Add alt text, captions, and titles, and insert images and galleries into your content. We've even added a few image editing tools you can have fun with.
- Full Standards Compliance Every piece of WordPress generated code is in full compliance with the standards set by the W3C. This means that your website will work in today's browser, while maintaining forward compatibility with the next generation of browser. Your website is a beautiful thing, now and in the future.
Steps To make a blog in blogger:
To start a blog with Blogger, visit the Blogger homepage, enter your username and password, and click Sign in. Enter a display name and accept Blogger's Terms of Service. Then click the Create a Blog link and get started!
Pick an address (URL) and a blog title. Then, choose your favorite blog template (this is how your blog will look when you publish it). Now get creative, add information to your personal profile, and customize how your blog looks, if you feel up to it. Start blogging now!
Back to top
Dashboard
- Writing a new post: Just click on the orange Pencil icon on your Dashboard to access the Post Editor.
- Viewing your posts: The gray Post List icon will take you to a list of your published and drafted posts for a specific blog.
- Catching up on your favorite blogs: Below the list of your own blogs, you’ll see a list of the blogs you follow with an excerpt from their latest posts.
- Everything else: Check out the drop-down menu next to the Post List icon for a quick link to:
- Overview
- Posts
- Pages
- Comments
- Stats
- Earnings
- Layout
- Template
- Settings
Back to top
Overview
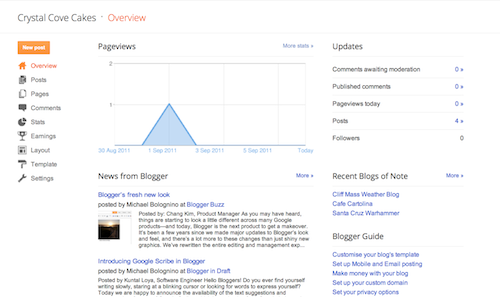 On the Overview tab, you can see your blog’s activity, news and tips from the Blogger team, and recent Blogs of Note.
Back to top
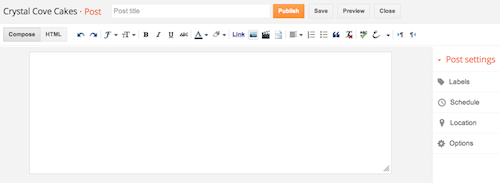
Write your post
Once you've signed in to Blogger, you'll see your dashboard with your list of blogs. Here's what you need to do:- Click the orange pencil icon to write a new post, and enter anything you want to share with the world.
-
Next, you'll see the Post Editor page. Start by giving your post a title (optional), then enter the post itself:
-
When you're done, click the Preview button at the top to make sure it's ready to go, and then click the Publish button to publish your post.
Add an image
You can add an image from your computer or the Web to your blog. Click the image icon in the Post Editor toolbar. A window appears prompting you to browse for an image file on your computer, or enter the URL of an image on the Web.Once you've selected your image, you can then choose a layout to determine how your image will appear in your post:
- The 'Left', 'Center', and 'Right' options allow you to customize the way your blog text will flow around your image.
- The 'Image size' options will determine how large the image will appear within your post.
You can also publish images to your blog using your mobile device, Google's free photo software Picasa, or a third-party service like flickr.
Back to top
Add a video
To add a video to your blog post, click the film strip icon in the Post Editor toolbar above where you compose your blog text. A window appears prompting you to 'Add a video to your blog post.'Click Browse to select the video file from your computer that you'd like to upload. Note that Blogger accepts AVI, MPEG, QuickTime, Real and Windows Media files and that your video must be less than 100MB in size.
Before uploading your video, add a title in the 'Video Title' box and agree to the Terms and Conditions (you'll only have to do this the first time that you upload a video with Blogger). Then click UPLOAD VIDEO.
While your video uploads, you'll see a placeholder in the post editor showing where your video will appear. You'll also see a status message below the post editor letting you know that your upload is in progress. Depending on the size of your video, this usually takes about five minutes. When it is complete, your video will appear in the post editor.
Back to top
Customize
Your template is a fun way to customize your blog. When creating a new blog, you're first asked to choose a default template, this is the basic design of your blog. You can choose from many templates for your blog; simply pick the one that best fits your needs.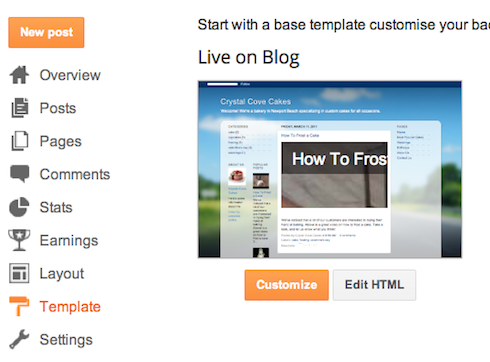 Once on the Template tab, you can either click on the orange Customize
button to get started with our easy-to-use WYSIWYG (“What you see is
what you get”) template designer, or choose one of our many default
templates. If you’d like to edit the HTML of your blog, just click the
gray Edit HTML button.
Once on the Template tab, you can either click on the orange Customize
button to get started with our easy-to-use WYSIWYG (“What you see is
what you get”) template designer, or choose one of our many default
templates. If you’d like to edit the HTML of your blog, just click the
gray Edit HTML button.In addition, you can customize your blog's design using our intuitive drag-and-drop interface. You can also add powerful gadgets such as slideshows, user polls, or even AdSense ads. If you want more precise control over your blog's layout, you can also use the Edit HTML feature. To edit your blog's layout, follow these steps:
- Click Layout from the drop-down menu on your dashboard below the blog you would like to customize.
- From there, click Edit to edit existing gadgets, or Add a Gadget to add new ones.
- To add a new gadget after you've clicked Add a Gadget, simply click the plus sign next to your desired gadget. You can choose from gadgets by category, or search for a specific gadget in the top right of the pop-up window.
- Once you've added the necessary information to your selected gadget, click the orange Save arrangement button. Your layout changes will appear instantly.
Privacy and permissions
By default, your blog is completely public, and can be read by anyone on the internet. However, if you want to keep it private, you can do that, too. You can change these settings on the Settings | Basic tab.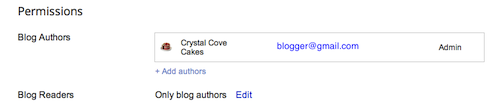
- Under the 'Blog Readers' section, you'll probably see 'Anybody' selected as the default. When you change this to 'Only these readers,' you'll get an Add Readers button.
- Click the Add Readers button and then enter the email address of a person to whom you'd like to grant access to your blog. To add multiple people, separate their addresses with commas.
- For each address entered, the Google Account associated with that
address will be given access to view your blog. If an address is not
associated with an account, that person will receive an invitation email
with a link allowing them do one of three things:
- Sign in to an existing account.
- Create a new account.
- View your blog as a guest (no account required).
Steps To make a blog on wordpress:
WordPress.com is the easiest way to create a free website or blog. It's a powerful hosting platform that grows with you.
- Easy to use. WordPress.com lets you create beautiful and powerful websites or blogs.
- Your own domain name. ...
- Search engine and SEO friendly.
Steps:
Signing Up for Your First WordPress.com site
To sign up for your first WordPress.com site, simply fill out the signup form.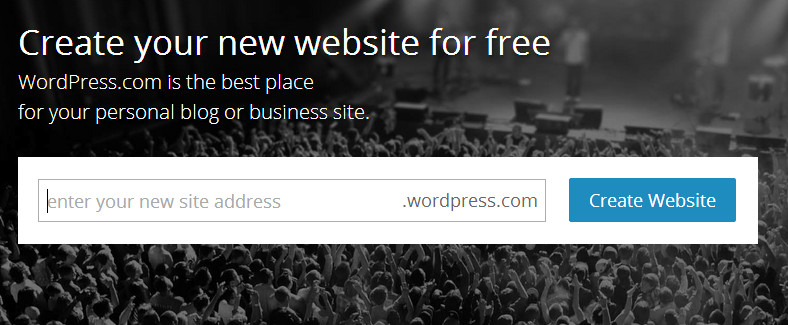
Your site address can include lowercase letters (a-z) and numbers.
Adding New Site to an Existing Account
- Log in to your account (if you are not already logged in).
- Point your browser to http://wordpress.com/signup to register your new site.
- Log in by clicking/tapping on the Login button on the http://wordpress.com page.

- Select the My Sites tab.

- Open the site selector by clicking on Switch Site at the top of the sidebar.

- Click or tap on Add New WordPress at the bottom of the sidebar.
Additional Info
A WordPress.com site owner can choose, at any time, to permanently delete their site. There are any number of reasons someone may want to do this, and we certainly respect their wishes and decisions.
Sites that have been deleted by the owner will remain deleted. We cannot, under any circumstances, allow someone to take over a site name that was previously owned and deleted by its original/previous owner. Please do not submit support requests asking us to do this.
Reserved Site Names/URLs
When a WordPress.com user signs up for an account we reserve the URL of their username. So if they signed up for the username of exampleuser we would reserve exampleuser.wordpress.com for them. There is nothing we can do to unreserve it and you will need to choose a different name.
Domain Names
Your WordPress.com site’s URL can be edited later, while the custom domain you have purchased is not.
Happy Blogging
:) :)


0 comments:
Post a Comment